


Face Charts Talk Through
- Christelle D. M

- Aug 10, 2018
- 2 min read
Updated: Aug 12, 2018
Face Charting Face chart for a Makeup Artist is a great tool to create looks, it’s also the best way to show potential clients your work and what you are able to create. It’s our ‘storyboard’, also a great form of practice if you are unable to get models.
I’ve been meaning to share some tips and tricks.
I attended a masterclass with the Insta famous, Makeup Artist/Face chart Artist Sonya Miro...so talented! She went through the tools and techniques of creating a face chart.

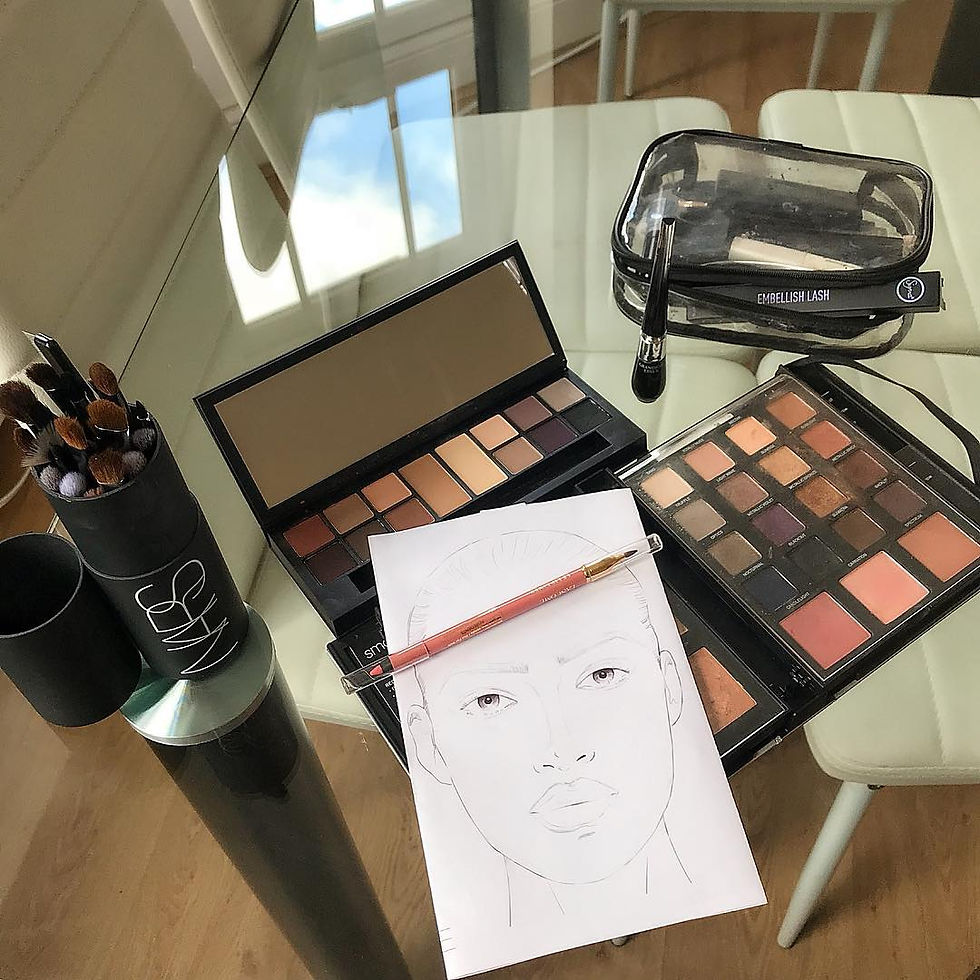
1. The paper - the type of paper used for the face charts are so important, photocopy paper is okay but not great. For instance, the pads on counter which have a cardboard feel are a good example of the type of paper to use.
2. The tools - this is a matter of choice and comfort. I personally use 2 crease brushes, a large shadow brush, a small angle brush, a lip brush, a pencil and tipex or white pencil. I instead used the liner plume 00.
3. The Makeup - eyeshadow palette neutral, liquid liner, lipstick and blusher. Nail polishes 1 Base coat or top coat and any other colour you wish.
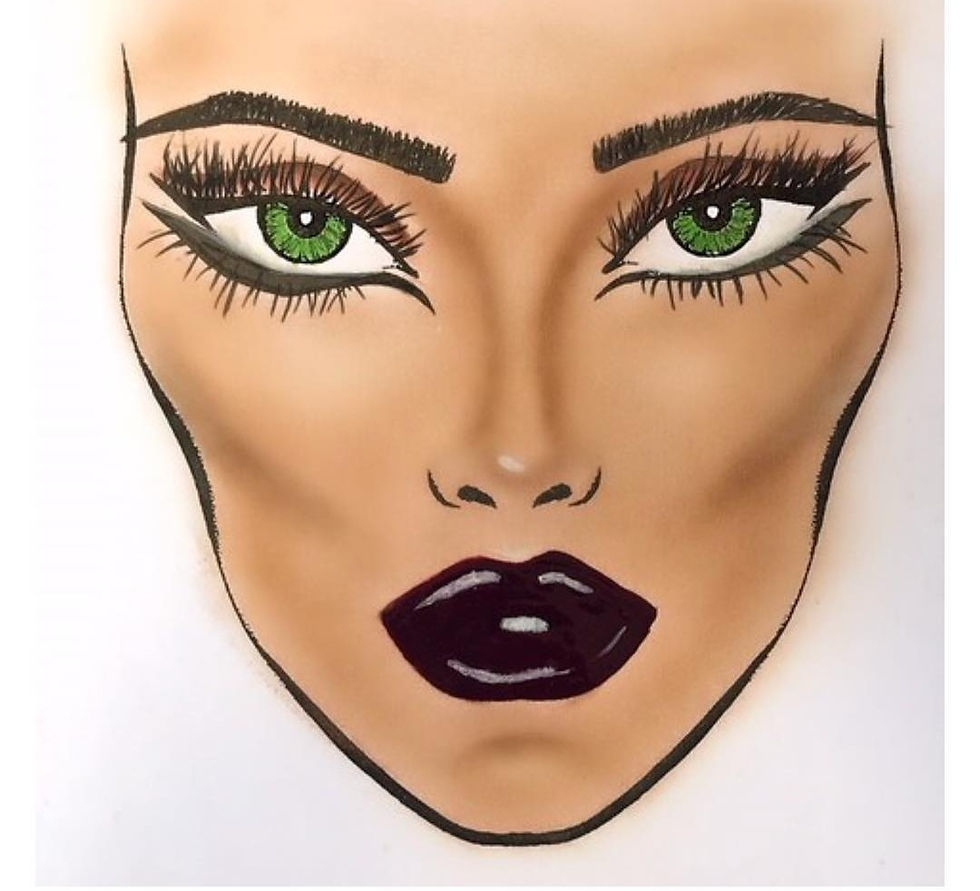
Colouring a face chart depends on what look you want to create, these are the products I used: Base - Belle De Tient 04. Contour - Ombré Hypnose Mono I204. Eyes - Hypnose palette DO1, Liner plume 01 and 00. Lips - Berry Noir and Top coat.
So...before I start painting I use my pencil to draw the brows, shape the nose, basically map out the kind of face I want to create.
I start of by using the belle de Tient to create the shadows, contouring with the light colour and blending it with my large crease brush, this creates the base. Going over it again and again to add more colour. After which I use the darker colour to contour my face chart. It’s not as complicated as it sounds - it’s simply makeup on paper. I use the black liner plume to fill in the brows and the lashes. Then use a nail polish (top coat) on top of the berry noir lipstick as a seal and to make the lips look glossy. Once the polish is dry, add the white pencil for texture to the lips, tip of the nose and the eye duct. This gives the face chart a 3D effect. One can use crayons to fill in the eye colour or even use it as lipstick - the face chart should look as real as possible. Once my face chart is done I take pictures and use editing tools to demonstrate different skin tones. Taking pictures is also a my way of seeing my mistakes and what needs improvement!
Some of these are techniques I’ve gained from Sonya Miro’s masterclass, however I’ve added a few techniques of my own to bring certain features to life. I’m still practicing and trying out new things. Hope this was useful and informative. Be creative always X

Comments